 USA
USA
 USD
USD

DIY Guide: How To Attach And Remove A Hair System
Posted by Santana Fell on Oct 16, 2024
Any Hair Systems user would gladly agree that hairpieces for men are a great addition to their lives, elevating their appearance and spiking their lost confidence. These hair accessories instantly cover bald crowns, thinning hair, and even receding hairlines, giving you a youthful appearance and taking you from zero to a hundred real quick.
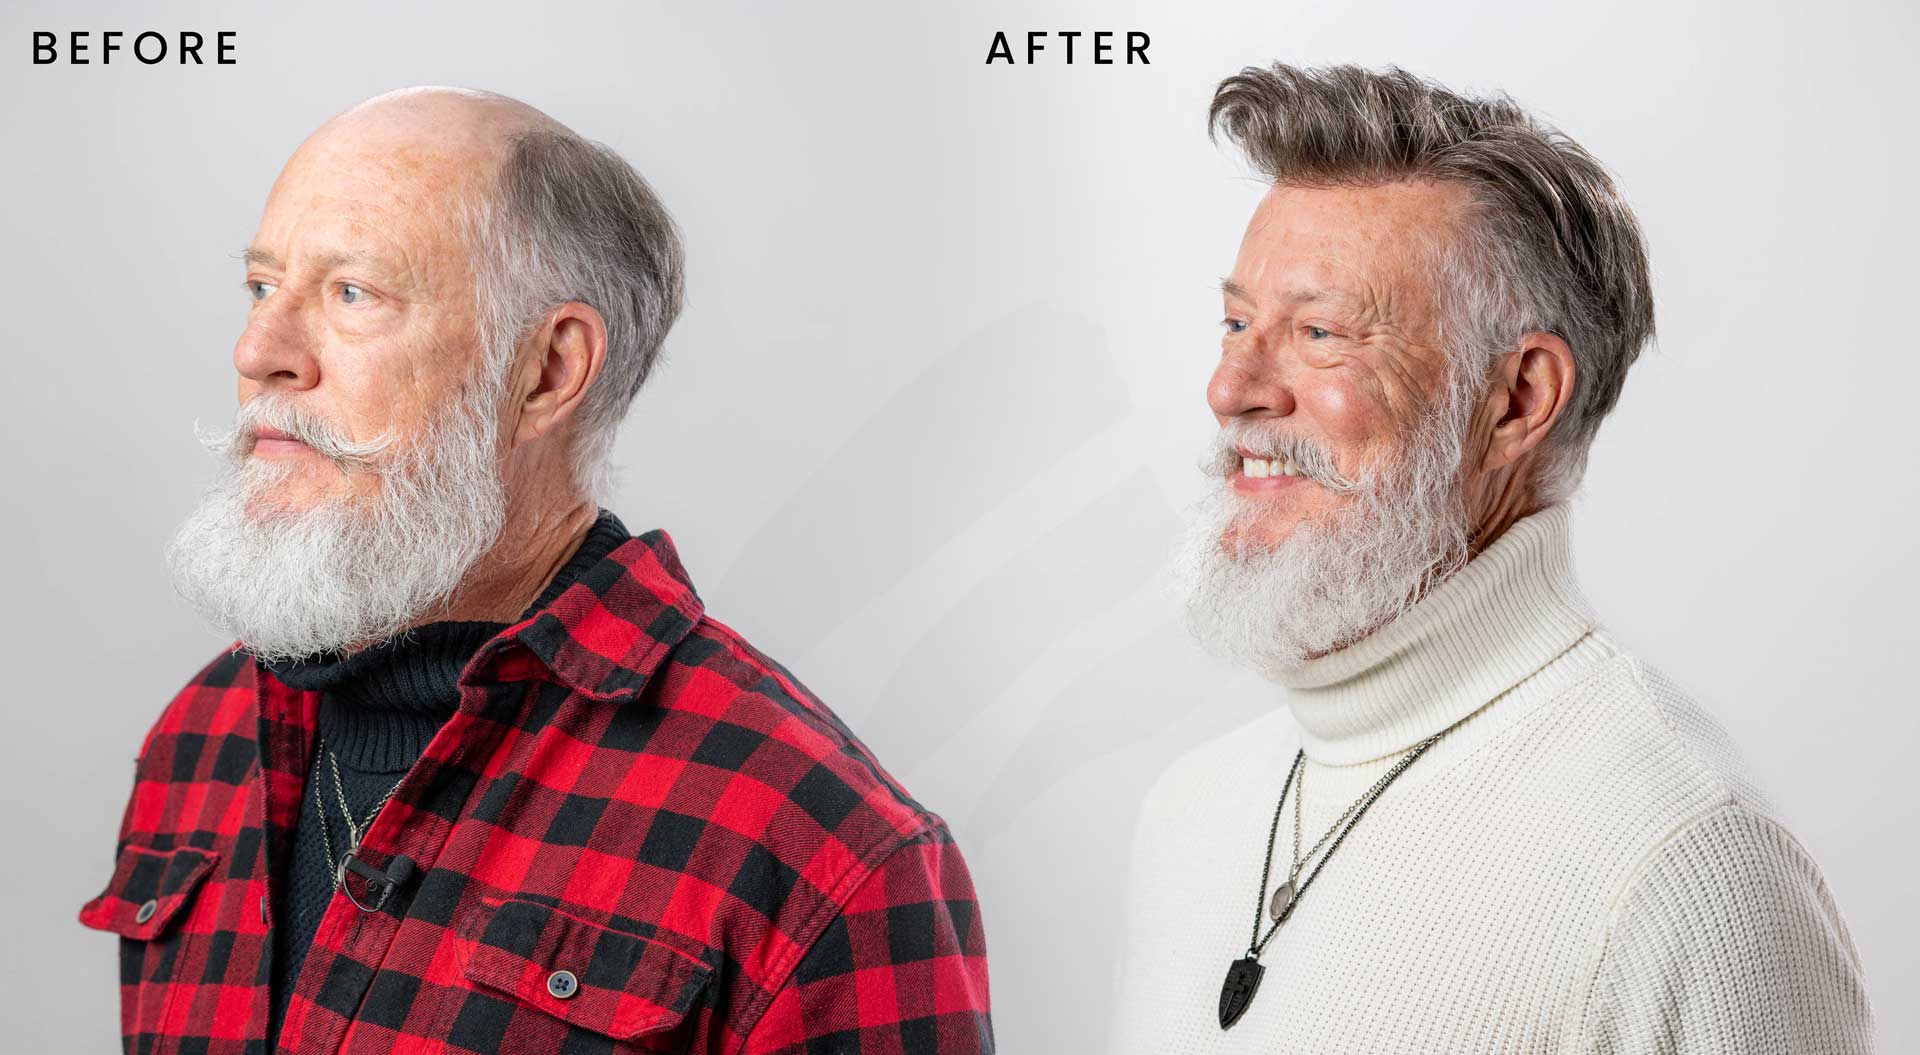
Human hair systems are your best bet for an unbeatable natural look. While looking your best with a toupee feels amazing, regular maintenance is crucial for it to remain in prime condition and continue giving you a realistic, undetectable look.
It is always advised to seek professional assistance to cut your bio hair and clean, install, and remove your non-surgical hair replacement system. However, we believe you should brush up on these skills, too.
After using a men’s hair system, there is no turning back. Knowing how to maintain your men’s hairpiece yourself can help when you can not get an appointment at your favourite salon or while travelling. It is especially helpful when facing unforeseen circumstances where only you can help yourself.
So here is a step-by-step DIY guide on using our Installation Kit to attach and remove a hair replacement system for men in the comfort of your home.
What you need:
Choose one of the following Installation Kits depending on the type of hair system you use.
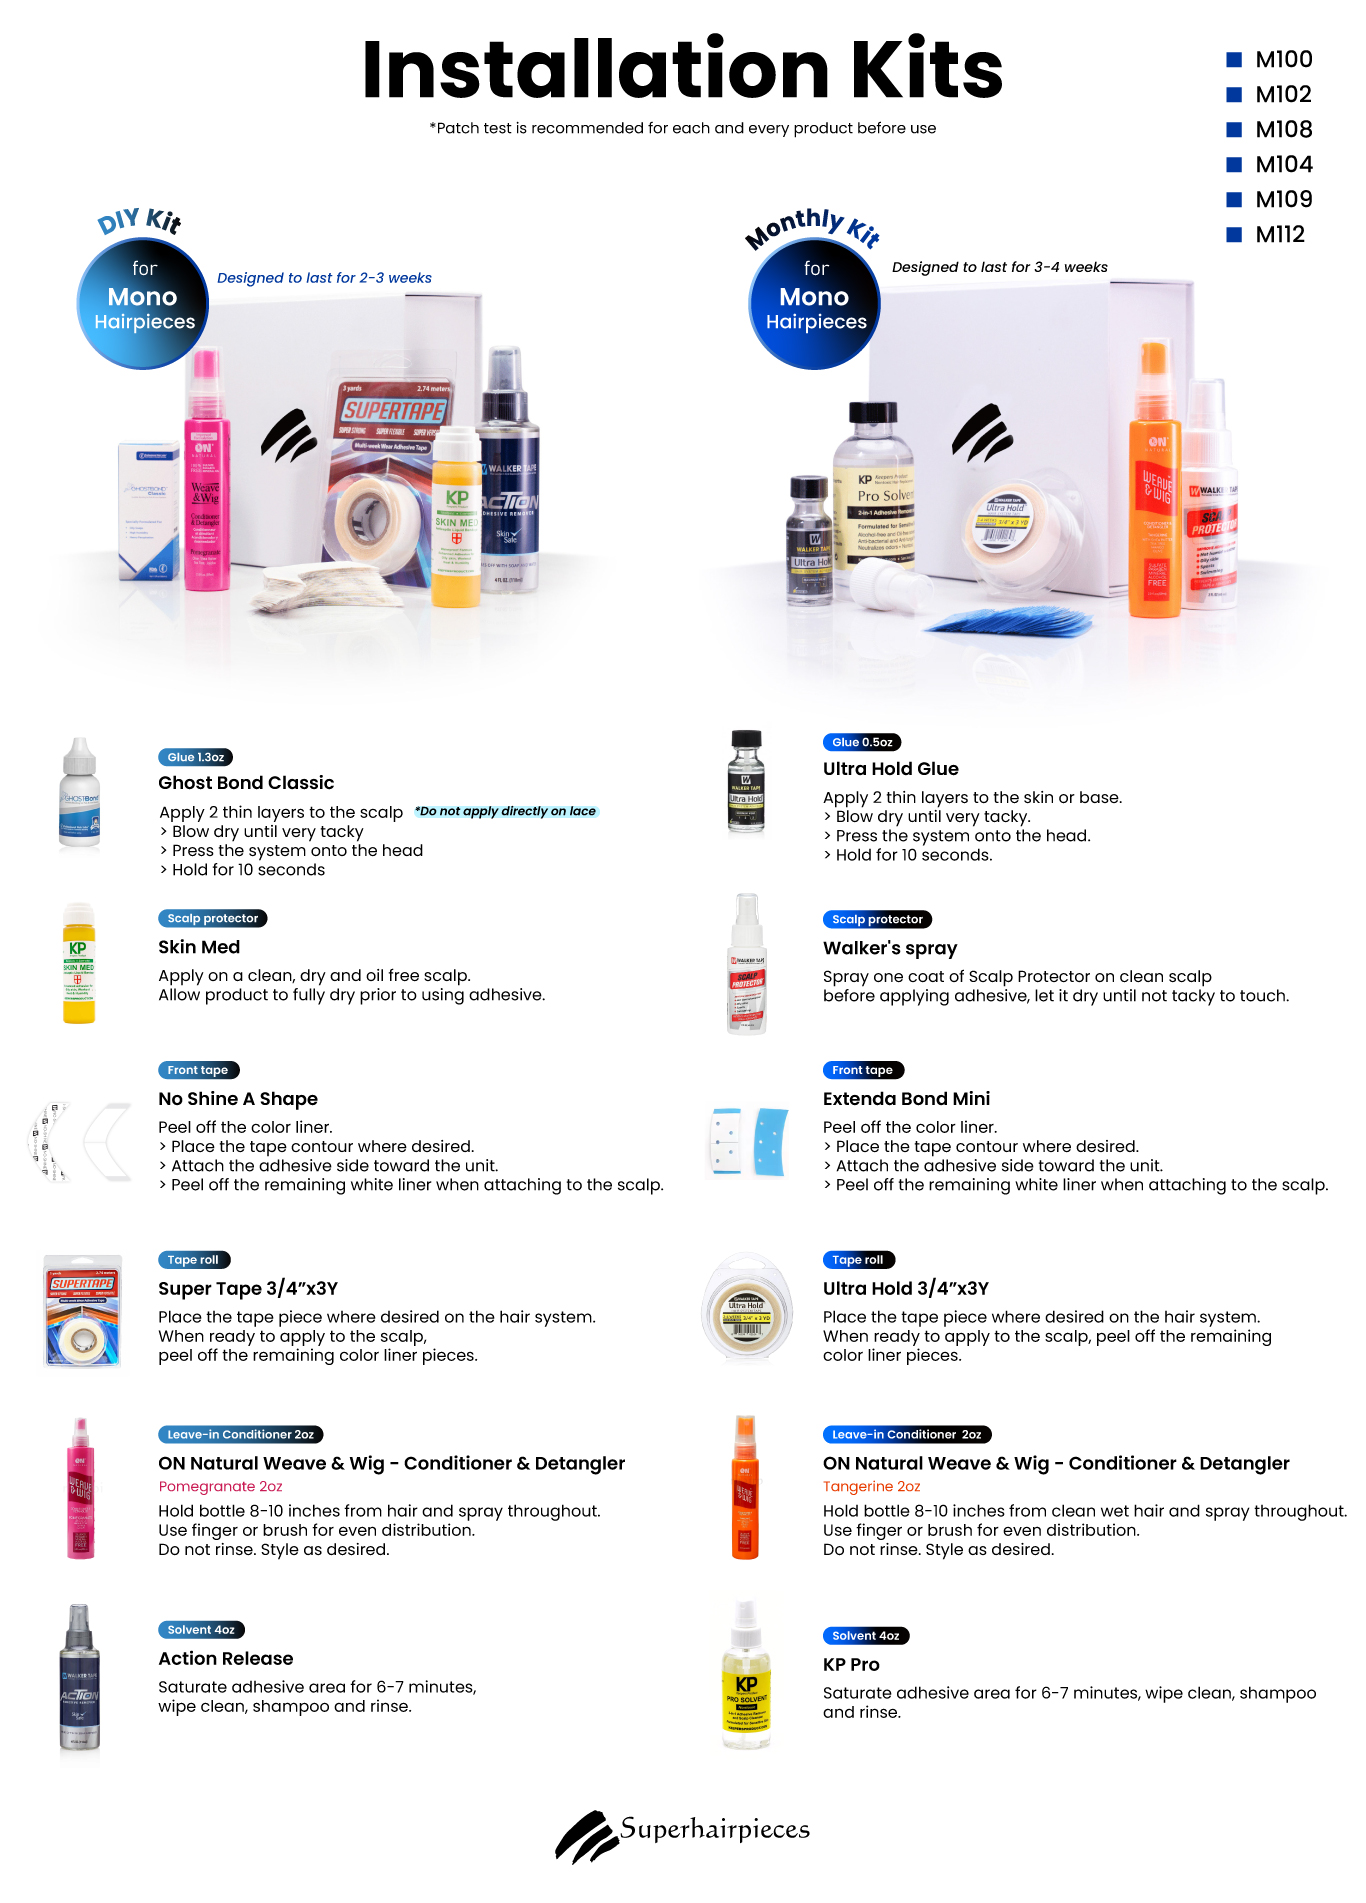
Installation Kit for Mono Hairpieces
- DIY Bi-weekly Hairpiece supplies (designed to last for 2-3 weeks)
- DIY Monthly Hairpiece supplies (designed to last for 3-4 weeks)
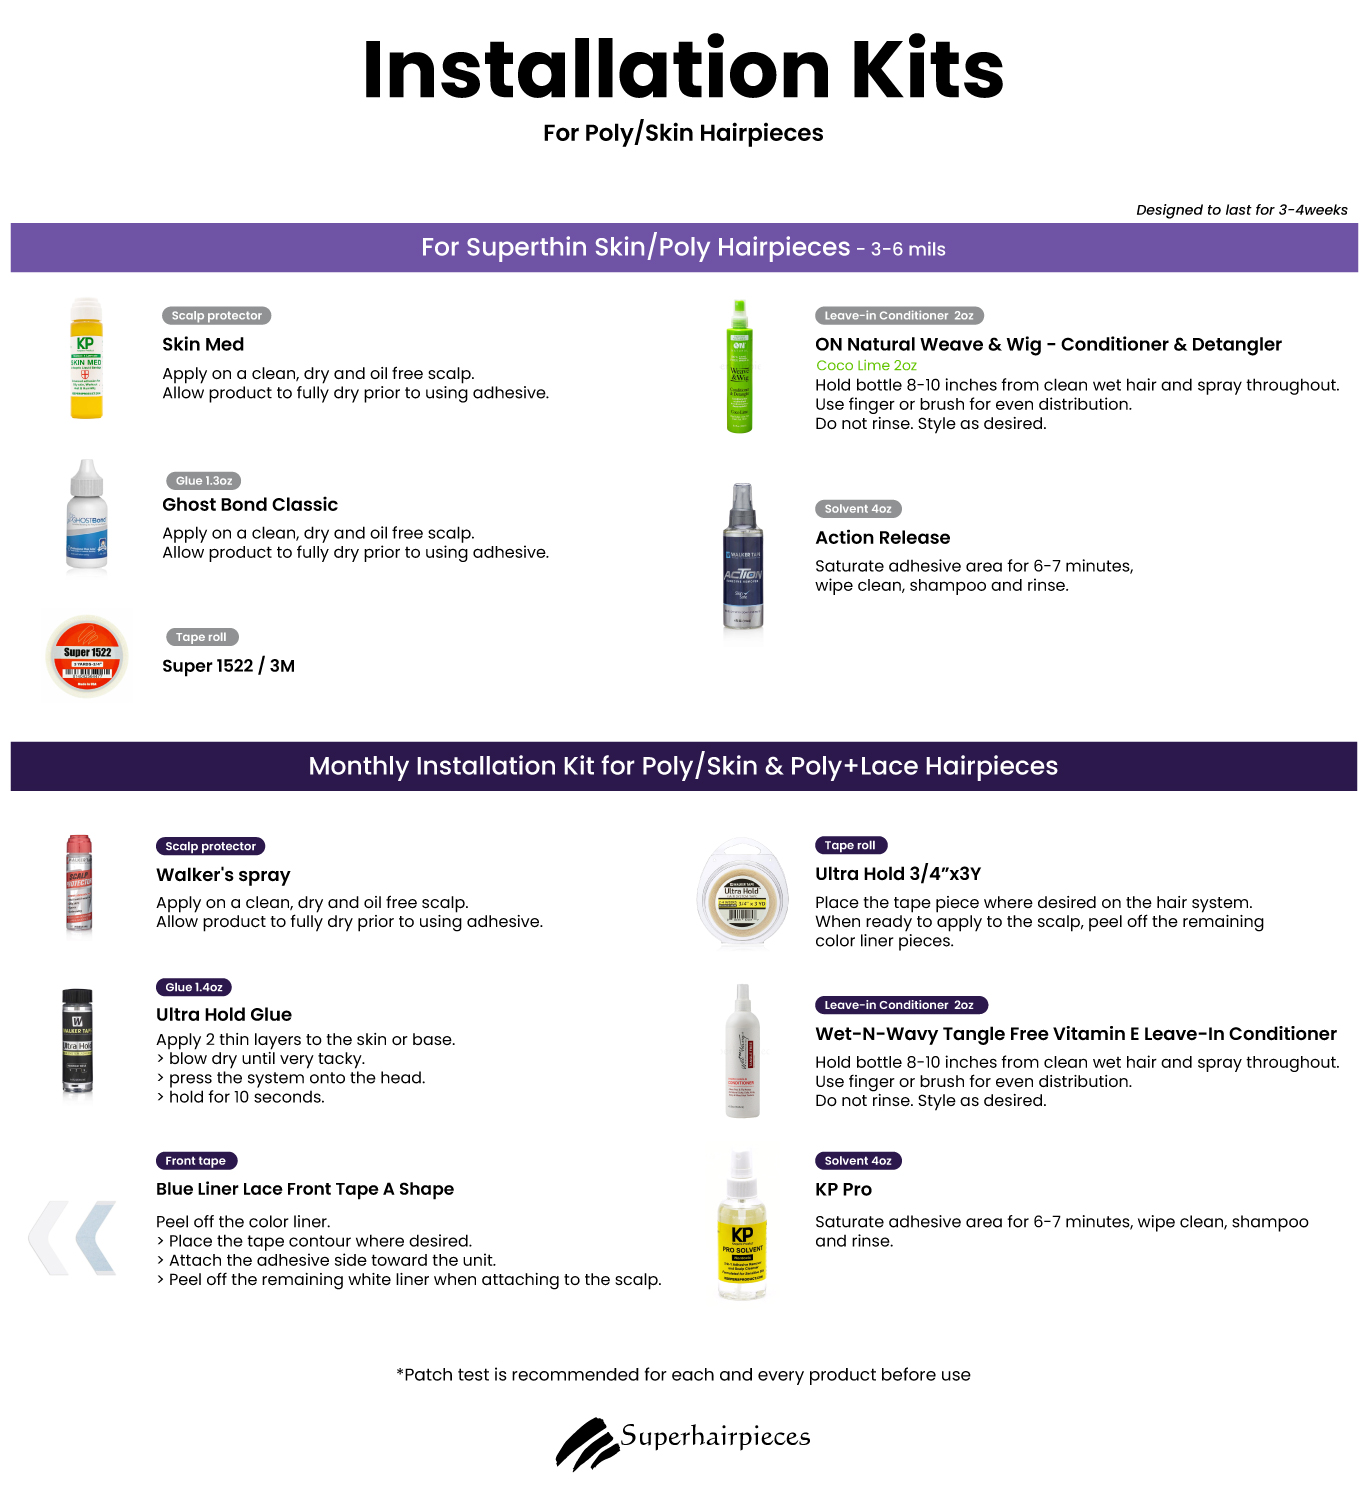
Installation Kit for Poly/Skin Hairpieces
- Installation Kit for Superthin Skin/Poly Hairpieces - 3-6 mils (designed to last for 3-4 weeks)
- Monthly Installation Kit for Poly/skin & Poly+Lace Hairpieces
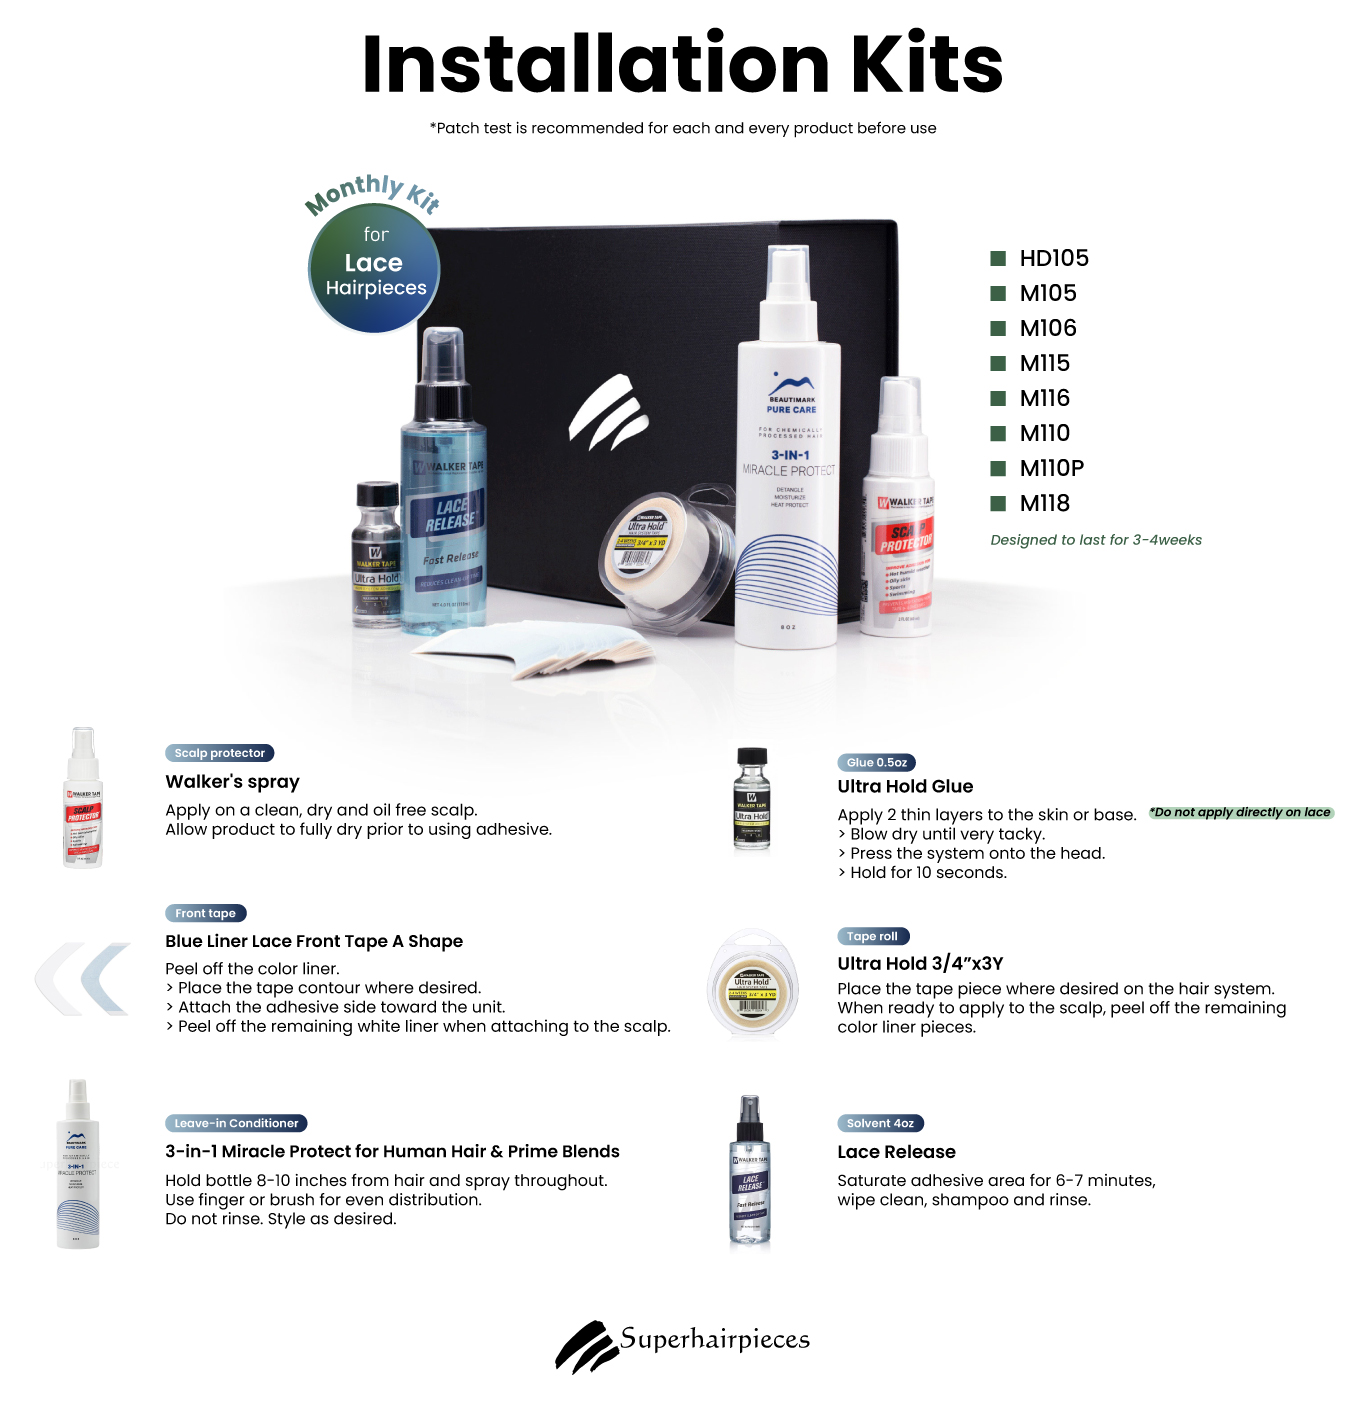
Installation Kit for Lace Hairpieces
- DIY Monthly Hairpiece supplies (designed to last for 3-4 weeks)
Attaching The Hair System By Yourself
To begin with, it's essential to get the basics right.
To make things easier for you, our installation kits come with just what you need for each type of hair system base. All you need to do is buy the kit, which also doubles as a travel kit, and follow the instructions, pictures, and videos to attach and remove your hairpiece like a pro.
1. Prepare the hair system
As soon as you get your men’s hair system and are ready to install it, the first step should be washing the hair gently.
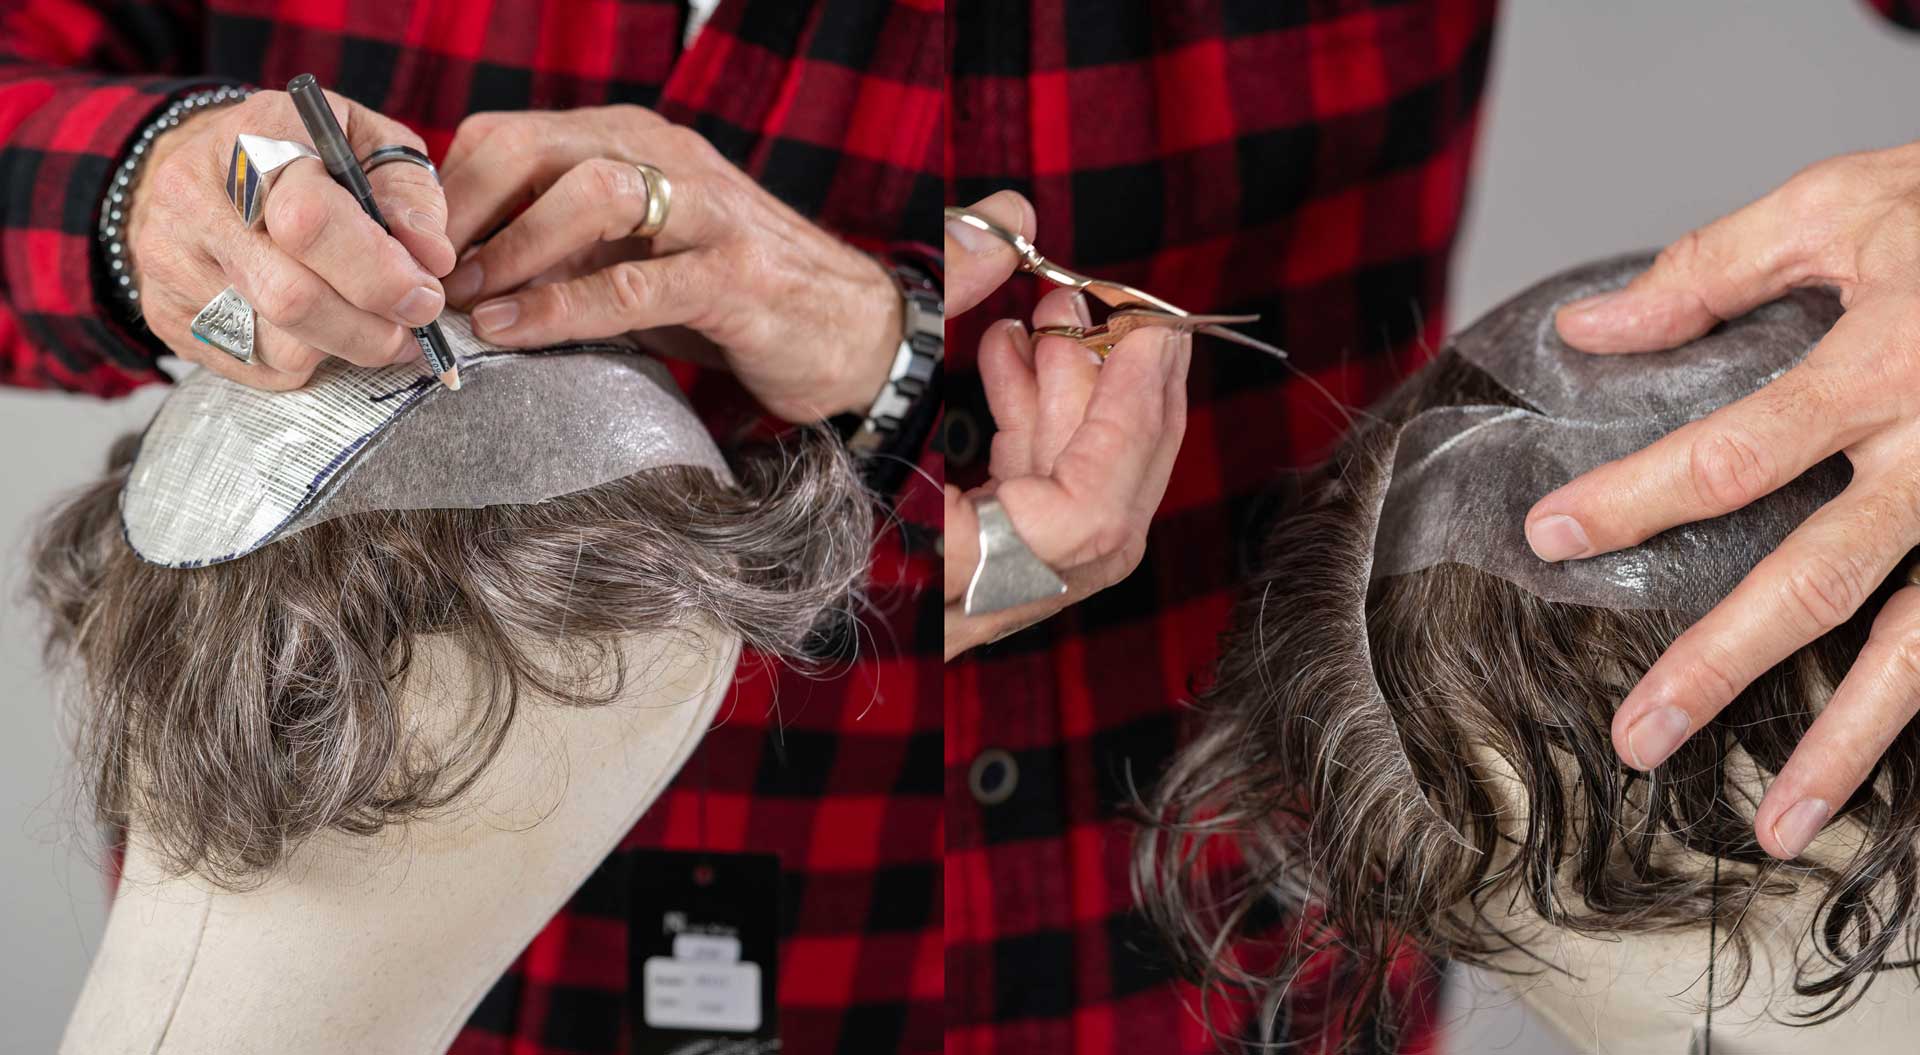
The next step is to make the hair system ideal for the balding area on your crown. Before you install your hair system, you will need to make it an ideal fit for your balding area. To do so, measure your scalp and balding area and cut the hairpiece to size it down so it will sit perfectly, concealing your balding crown.
You can also cut off extra material, such as extra lace, towards the front of the hairline. However, make sure to wet the hair before you do this, as it helps you avoid cutting the hair during the process.
Follow these videos to understand how to measure your scalp and how to cut the base down to size:
2. Prepare your scalp
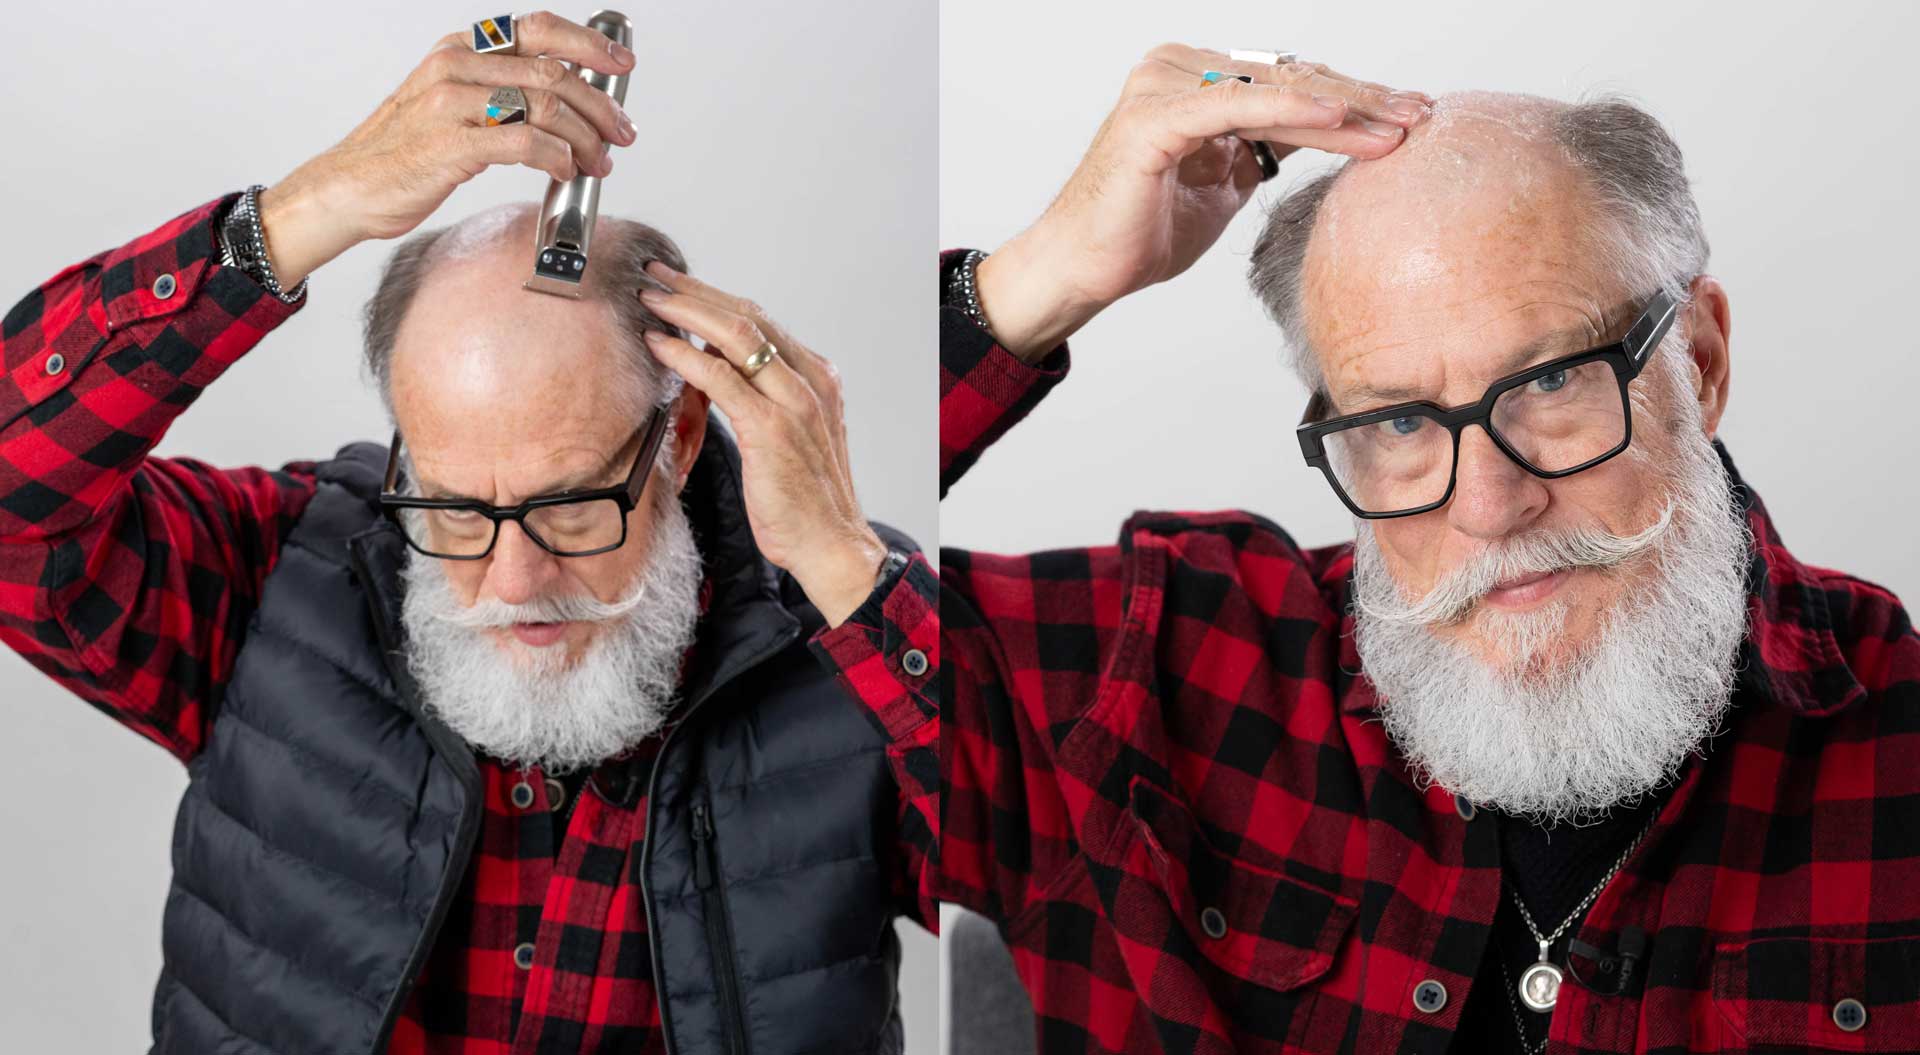
Once the hair system is ready, it’s time to prepare your scalp for the application process. Shave the installation area or bald scalp, trim and wash your bio hair, and clean and dry the entire head.
Once your natural hair is dry, use some cotton to apply an alcohol-based cleanser to the bonding area. While this dries, you can mark the hairline with an eyebrow pencil.
A valuable tip for determining where your hairline should start is to place four fingers horizontally on your forehead, above your eyebrows, and mark the spot where your fingers reach.
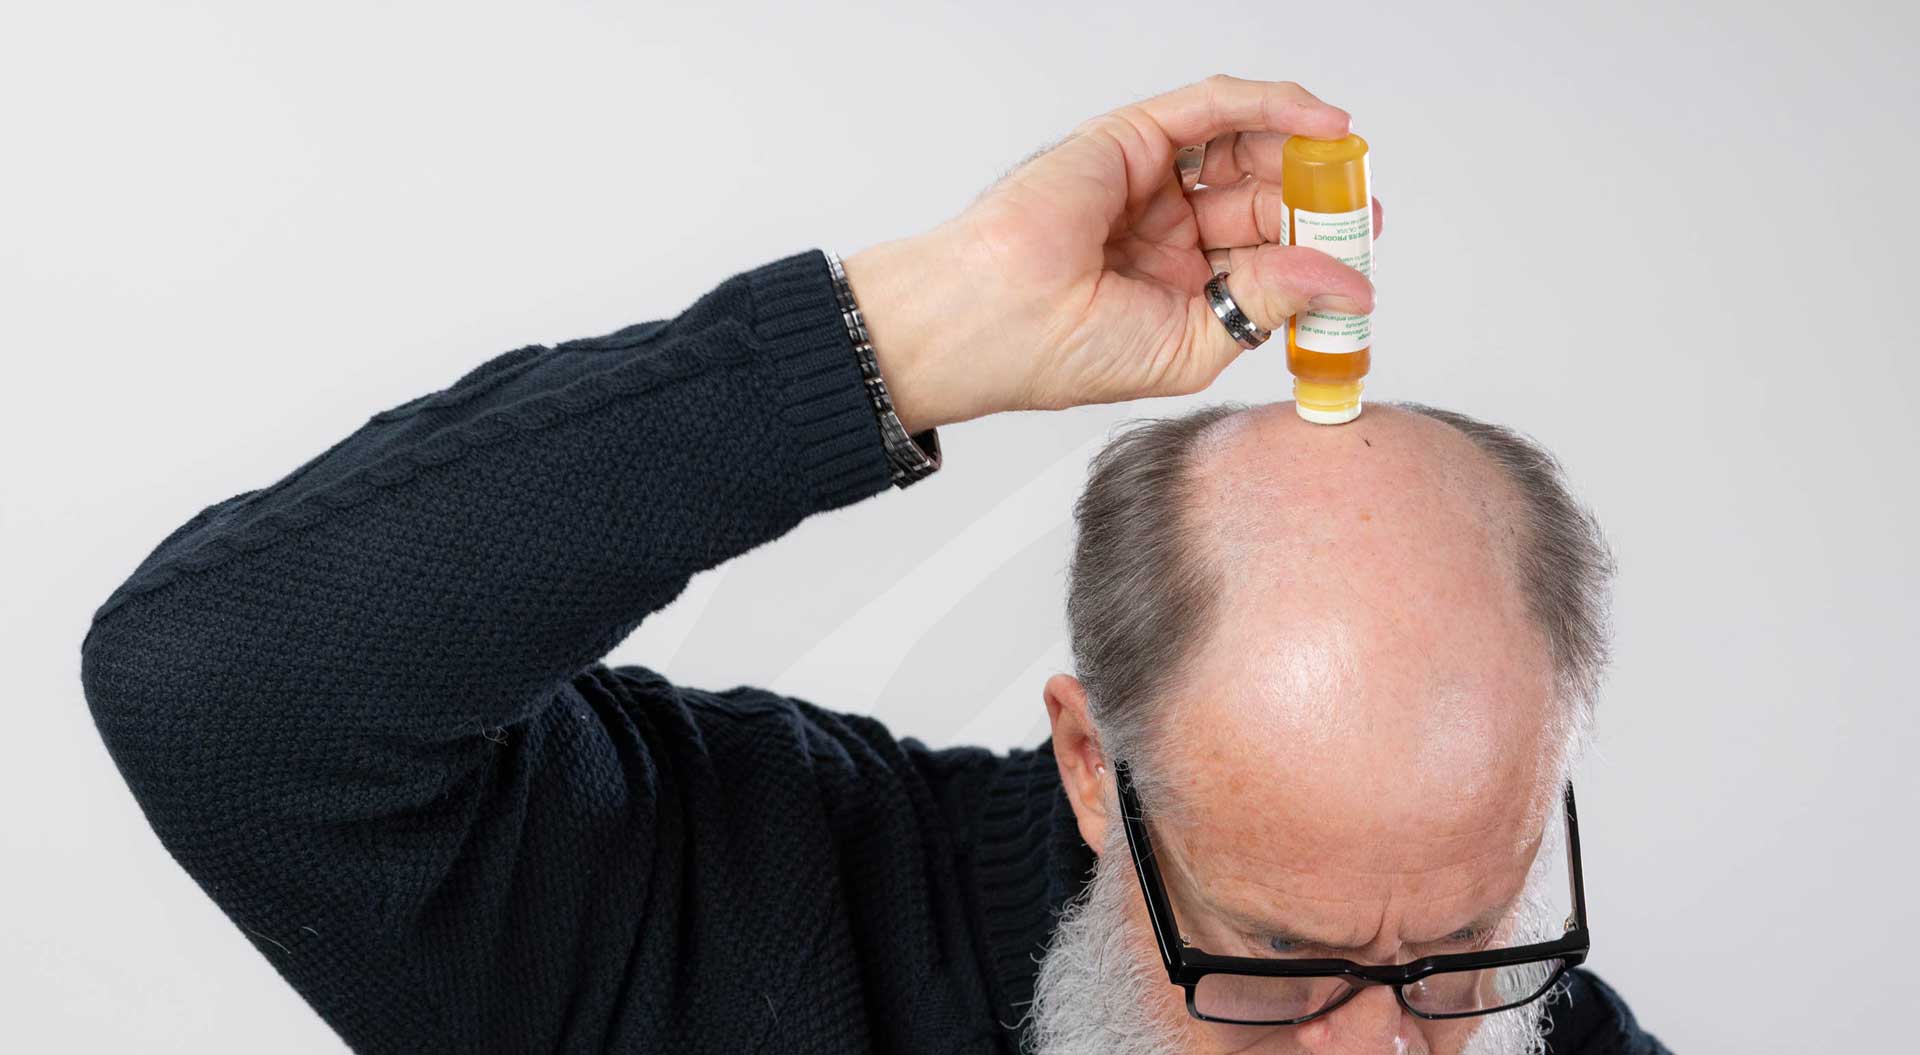
You can then apply a scalp protector (dab on or spray) to your head for added protection and to prevent any itchiness.
In case of an extremely sensitive scalp or if itchiness persists, it is best to visit a dermatologist.
3. Apply the adhesive — wig glue or wig tape
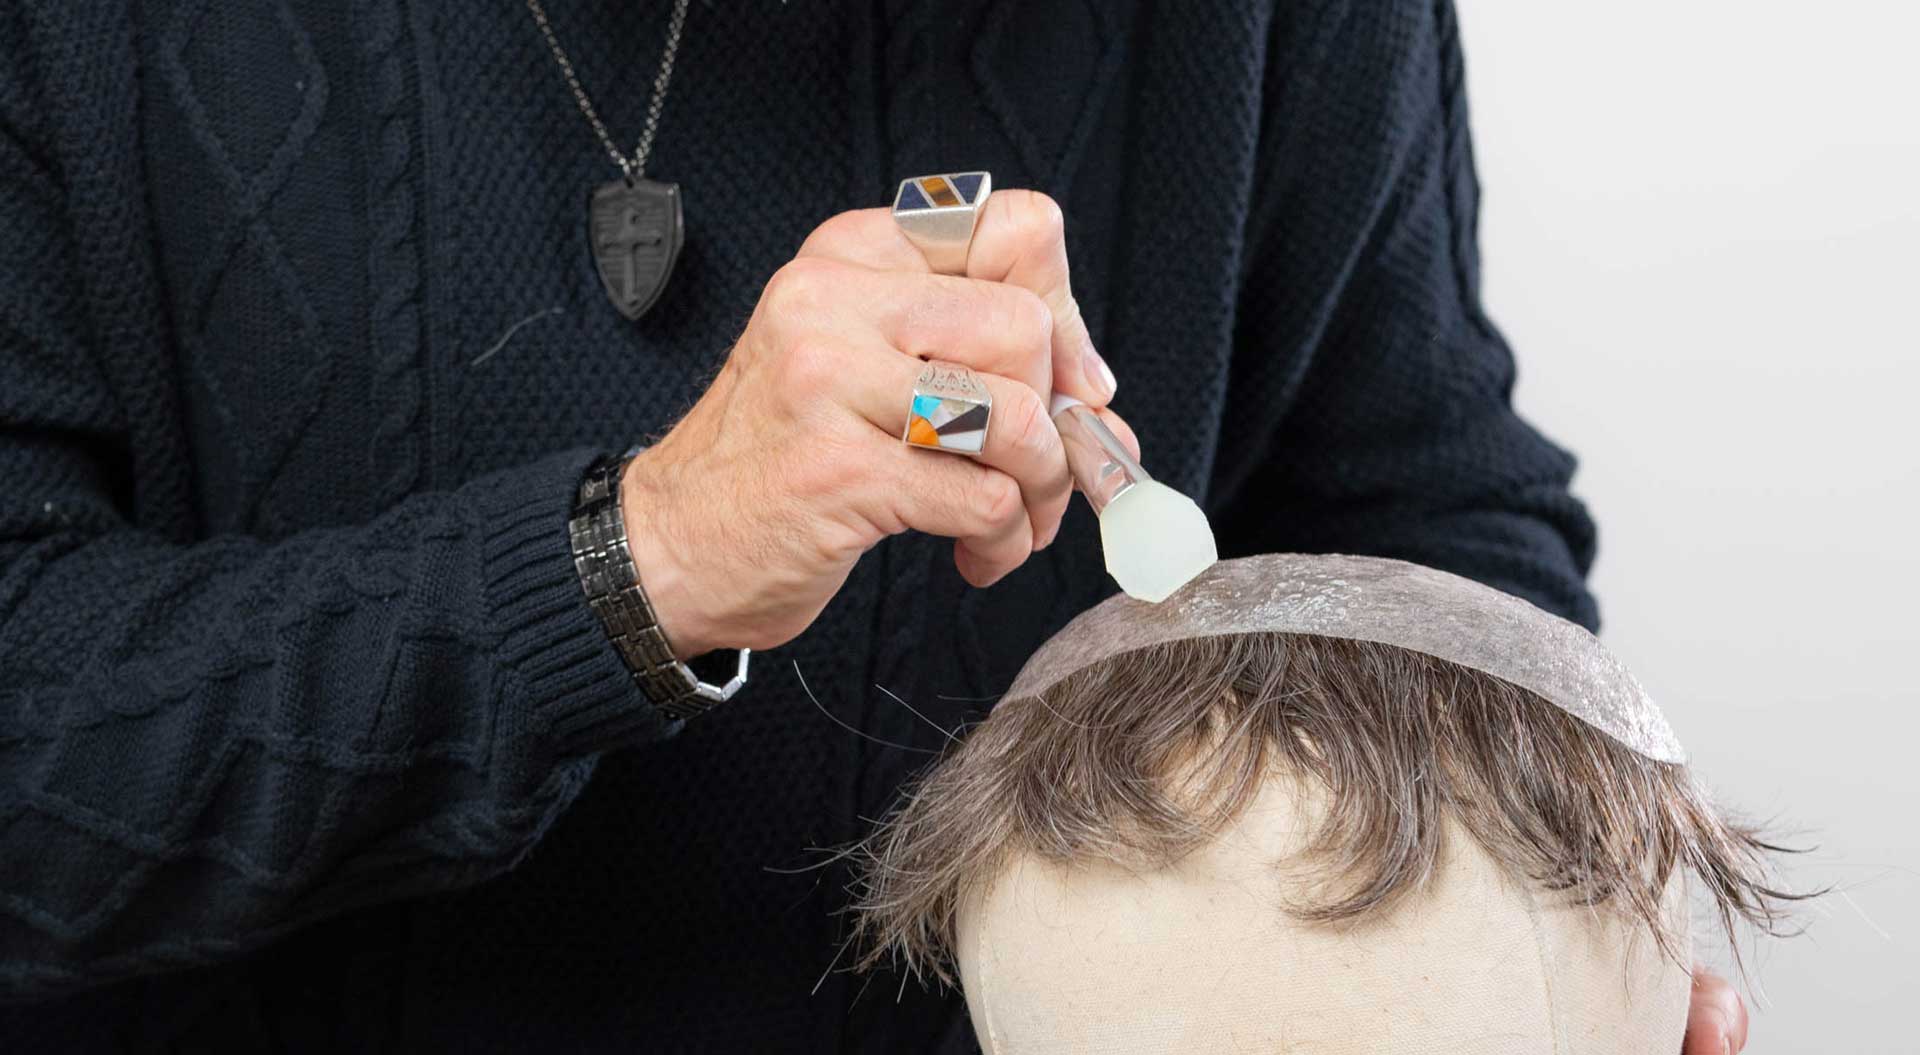
Now, it’s time to apply the bonding agent or wig adhesives to keep the hair system secure on the scalp.
Understanding which adhesive is suitable for which base is crucial to keeping your unit in good health and enhancing its longevity.
While attaching the hair system is practically the same for all base materials, there is one key difference between the full skin hair systems and other hair system bases, such as monofilament, lace front, and lace with a poly base.
When using a full-skin hairpiece, you can use adhesives like wig tape and wig glue, in combination or individually, all over the bald area of the scalp as well as the base of the entire hair system.
For all other units, it is NOT recommended to use adhesives, specifically glue on the center of the lace/mesh unit, as this can damage the hair system base and cause hair shedding. However, if it is really needed or preferred, Ghost Bond glue or any kind of tape can be used only in the center of the scalp, not on the hairpiece base.
For a full lace hair system, you can use adhesive glue on the scalp and wig tape anywhere on the unit's base.
Pro Tip: You can also apply isopropyl alcohol to dry, clean, and disinfect the scalp and base completely before applying tape or glue. A hairdryer can speed up this process.
4. Install the hair system
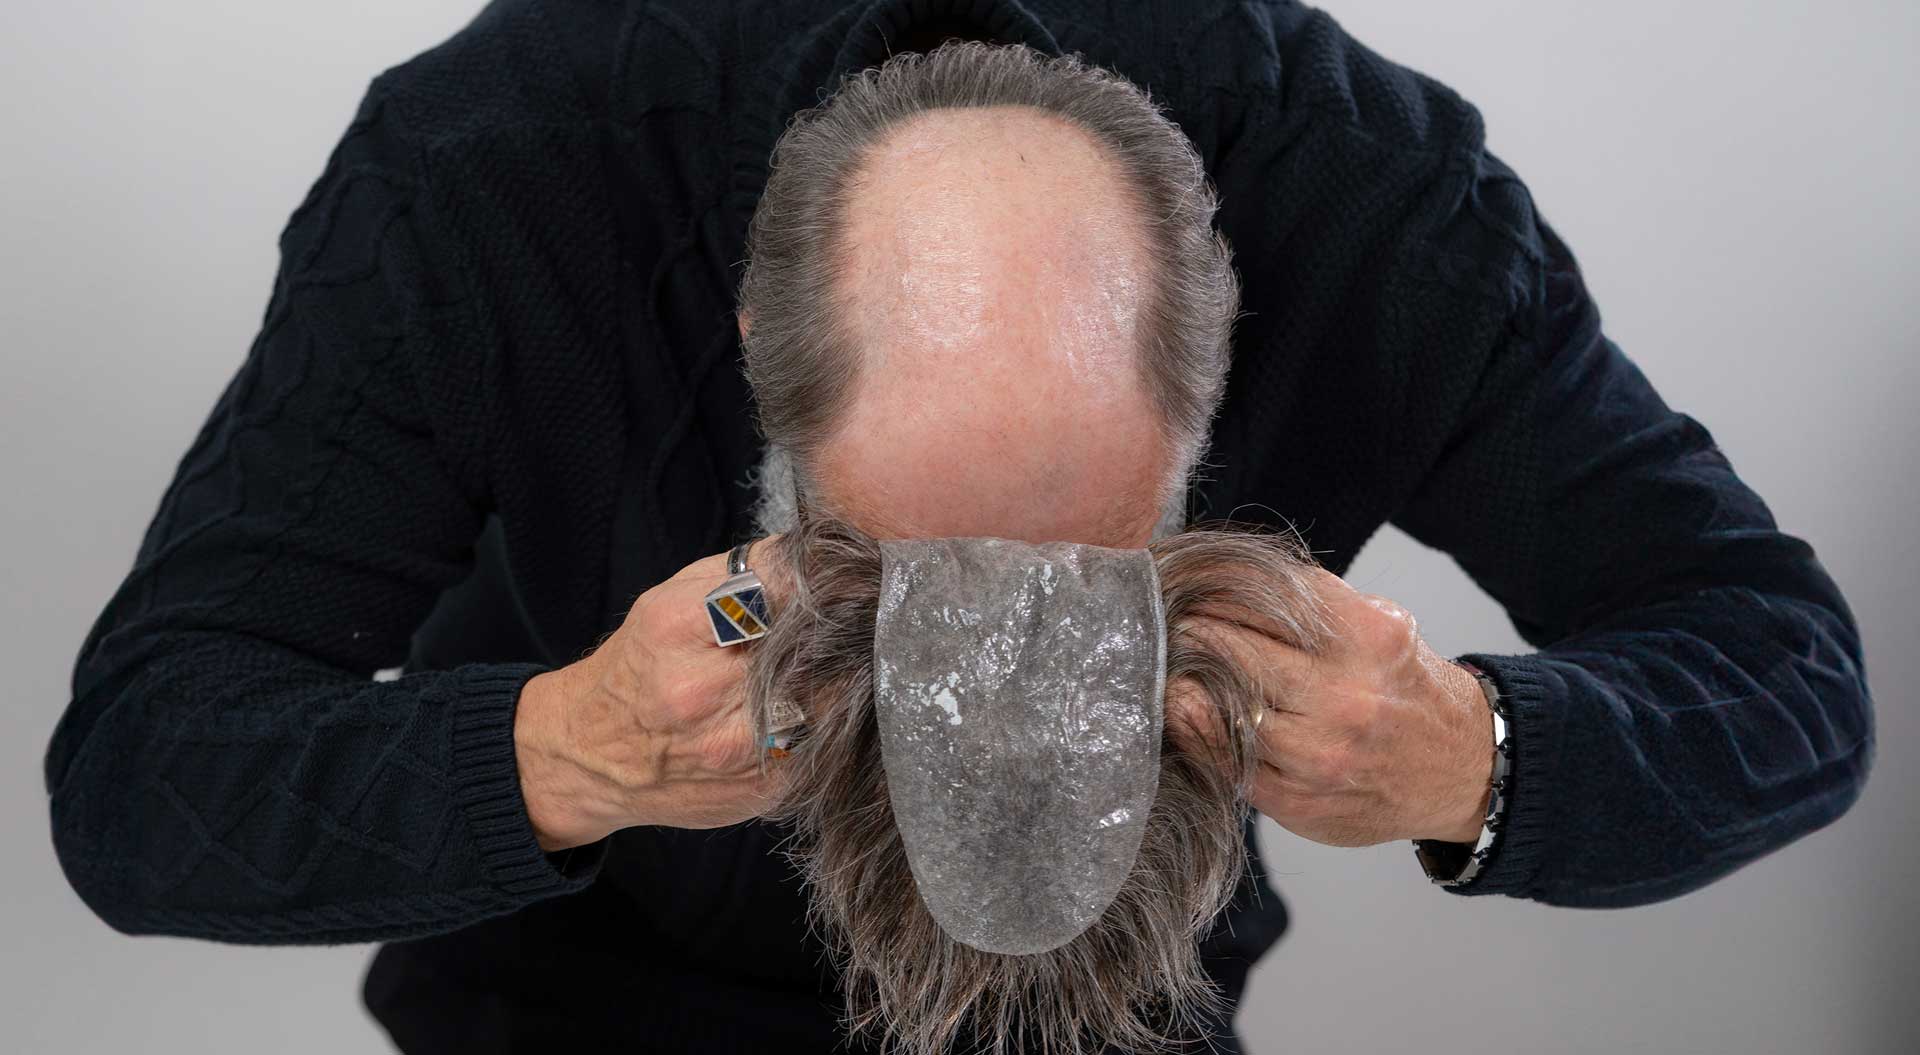
Now that the scalp and hairsystem are ready, it's time to get them together.
Gently position your hair system on your scalp. Start from the front of the hairline (where you have marked it) and keep attaching it backwards. Stretch out the system as you’re doing this so that there are no air bubbles in between.
Pro Tip: Hold the hair while applying the unit so it doesn’t come in contact with any adhesive.
Once the hair system is positioned correctly, press and hold it on your scalp for around a minute to fix and secure it.
It is crucial to keep the system dry for at least 24 hours following installation. This ensures a safe and secure grip.
Add some styling, and you will be ready to rock your new look!
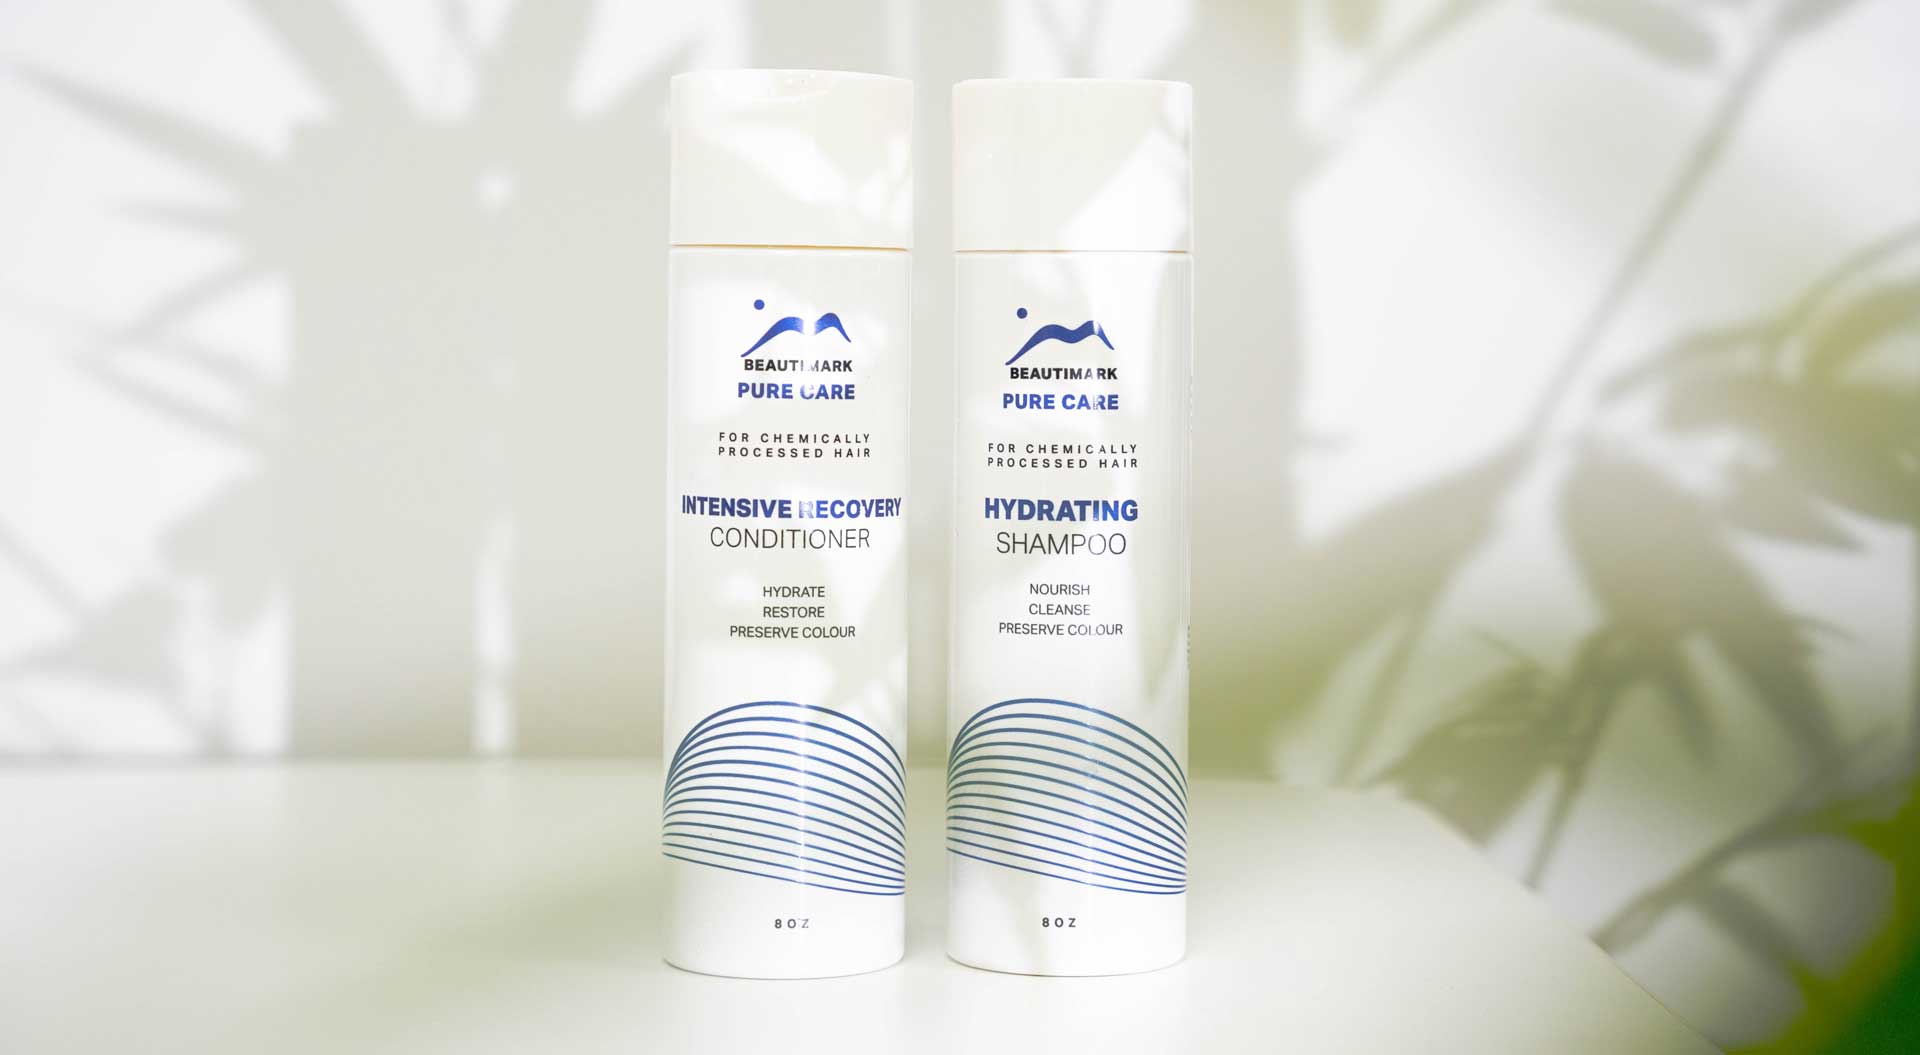
When styling, apply a Leave-in conditioner that helps keep the system smooth, silky, and soft for longer. This step improves the hair's overall health while protecting it from heat damage, tangles, and dry split ends, making it more manageable.
If you would like to see a Superhairpieces stylist install a hair system on a client, you can watch the following video:
5. Removing the hair system

The removal process for a hair system is quite easy. All you have to do is use adhesive remover spray (solvent) around the perimeter of your hair system. Wait a few minutes for the adhesive to loosen up or break down, then gently remove it from the back so as not to damage your front hairline.
If there is resistance and the removal is not smooth, spray some more solvent and keep lifting the men’s hair system gently until it peels off with ease.
Once that’s done, wash your scalp with shampoo and conditioner to remove any adhesive residue.
Congrats! You now know how to install and remove a hair system on your own. You've got this!
Start your hair system journey today
While we encourage everyone to learn the installation and removal process, many people prefer professional help to look their best. Additionally, everyone's hair and scalp condition is unique, and some people may require more attention than others.
If you feel uncomfortable doing the hairpiece maintenance yourself, contact Superhairpieces customer service, and we will do it for you.
We take pride in providing several services, including online maintenance and taping (Base cleaning, Shampooing, Blow drying the unit, Deep hair conditioning, Hair shine spray, Taping service, Hairpiece complete checkup), online service package (base cut, hair cut, trim off empty base, and hairpiece maintenance), and also hairpiece repair services.
We can also thin down the density of your hairpiece, trim off empty lace, sew clips onto your unit, perm and style your hairpiece, and provide base cuts.
If you are in Canada, our salons also offer excellent hairpiece maintenance services. With multiple locations across the GTA, we are easy to reach and worth the try. Book your appointment for a renewed look.
If you are still unsure which hair system is best for you, book a consultation with our hair replacement experts today. They will happily help you choose the perfect hairpiece for your features and lifestyle.
Say hello to the best hair you've ever had!

 Likes
Likes


